Thursday, December 23, 2010

Clean and Simple Christmas


Merry Christmas Everyone!   Thought I would leave you with a few CAS Christmas cards I made to match some gifts I made for some special people in my life.  These were made in a matter of minutes using the Swirl Christmas set by Hero Arts and some inexpensive bling I had in my stash from Michael's.

I'm also proud to announce that I'm back on the team at the Cutting Cafe after a short sabbatical.  I'm so honored to join the new team and returning designers.  Regina is a talented digi creator and I love working with her digital images, boxes, and bags!

I will be back on New Year's Day late...to draw the winner of my blog candy.  I've added a few goodies to the stash so be sure to click the link to find out how you can win it.  I've added even more May Arts Ribbon!!

Merry Christmas and a blessed New Year to all of you!!

Pin It!

Wednesday, December 22, 2010

May Arts Ribbon Gift Bags

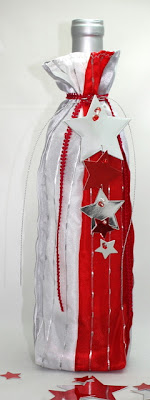
Do you need a few extra gift bags in a hurry?  I've got a tutorial on the May Arts Blog to the rescue!  If you've got a sewing machine, some scrap ribbon and a few minutes, you can create this

or this

                                                                           or this


Pin It!

WOYWDW81? Minty Middles Cookies!

My only workdesk this week has been in the kitchen and at the sewing machine.  This is one of the cookies that's always on the Christmas gift list.  There's a yummy surprise inside this one.  I triple this recipe for gift giving.  Merry Christmas to Julia and the ladies at WOYWD!!

Minty Middle Treasures

1/2 c. granulated sugar
1/4 c. brown sugar
1/4 c. shortening
1/4 c. butter, softened
1/2 t. vanilla
1 egg
1 2/3 c. all purpose flour
1/2 t. baking soda
1/4 t. salt
About 2 dozen Andes mint candies, unwrapped
Almond Frosting
Sugar or candy sprinkles

Heat oven to 400 degrees.  Beat sugars, shortening, butter, vanilla and egg in large bowl with electric mixer on med speed.  Stir in flour, baking soda and salt.

Shape about 1 T. dough around each mint.  Place 2 inches apart on baking sheet.

Bake 9-10 minutes or until light brown.  Remove from cookie sheet to wire rack to cool completely.  Frost and sprinkle.

Almond Frosting

1 c. powdered sugar
1 T. plus 1-2 t. milk
1/4 t. almond extract or vanilla
food color if desired

Mix all ingredients until smooth and thick enough to coat.

That's it.  Simple and oh so yummy!  Enjoy!

Grrr...blogger didn't post this again! Threw it into draft.


Pin It!

Monday, December 20, 2010

CAS98, Teapot Tuesday and Double Drizzle Pecan Cookies

I finished the cookie baking!!  Yahoo!!  Wednesday and Thursday will be delivery days. 

 I still have a few sewing gifts to complete but wanted to play in the CAS and Teapot Challenges this week.  I couldn't resist the inspiration piece for the CAS98 challenge this week.  I'd love to own that gorgeous apron!  I combined it with the MMTPT125 Challenge to make a card for teapotter Kris Chirhart (krischir) who is having surgery on BOTH of her wrists on  December 22nd.  If you'd like to send Kris a card to cheer her up, I know she'd love it.  I can't imagine surgery on both wrists and not being able to do anything!!

                                                     
Our teapot is a plain white pot and we were supposed to use watercolors, oils or chalks and paint a still life, portrait or abstract or whatever.  I don't draw or paint, not one bit of artistic talent in these old bones...I can barely draw a straight line with a ruler.  Soooo, I used chalk ink to stamp the Damask design...good thing the inspiration piece was an apron, 'cause I'm hiding cookies in my pockets!

Supplies:
Paper - SU Le Jardin DP, Neenah Solar white
Ink - Versamark Aloe Vera
Stamps - PTI Damask Designs
Accessories - MS punch, May Arts silk ribbon


Now these are worth getting in trouble for!   Super easy and you can squiggle to your hearts delight.  These are from Taste of Home.

Double Drizzle Pecan Cookies

1/2 c. butter, softened
1 1/2 c. packed brown sugar
1 egg
1 t. vanilla extract
1 1/2 c. flour
1 1/2 t. baking powder
1/4 t. salt
1 1/4 c. chopped pecans, toasted

Carmel Drizzle
1/2 c. packed brown sugar
1/4 c. heavy whipping cream
1/2 c. confectioner's sugar

Chocolate Drizzle (note: I used Ghiradelli Candy Making bar)
1 ounce semi-sweet chocolate
1 T. butter

Cream the butter and brown sugar until light and fluffy.  Beat in egg and vanilla.
Combine flour, b. powder and salt; gradually add to creamed mixture and mix well.

Shape dough into 1 inch balls; roll in pecans.  (I forgot this part and just stirred them in.)
Place 2" apart on cookie sheets.  Bake at 350 degrees for 8-10 minutes or until lightly browned.  Cool for 2 minutes on cookie sheet then move to wire rack to cool completely.

After all cookies are cooled, bring brown sugar and heavy whipping cream to a boil.  Remove from heat and stir in confectioner's sugar.  Immediately drizzle over cookies.

Melt chocolate and butter in microwave (1-2 min.) Stir until smooth.  Drizzle over cookies.  Let stand until set.  Store in airtight container.

Enjoy!!


Pin It!

Ambrosia Cookies

I tried a new recipe this year and it's wonderful!!  Chock full of mouth watering yumminess!!  DH was hovering over the cooling racks. 

Don't let the ingredient list scare you.  These take only minutes to stir up and bake once you gather the goodies and they are sooooo worth it.


Ambrosia Cookies

1 c. butter, softened
1 c. granulated sugar
1 c. firmly packed dark brown sugar
2 large eggs
2 c. flour
2 t. baking powder
1/2 t. baking soda
1/2 t. salt
1 1/2 c. old fashioned oats, uncooked
1 c. chopped dates
1 c. golden raisins
1 c. flaked coconut
1 c. chopped pecans
1 t. grated orange rind
1 t. grated lemon rind
1 t. vanilla extract
1/2 t. almond extract
1/2 t. orange extract
candied cherries, halved (I didn't have enough so I quartered them)

Beat buter and sugars until light fluffy.  Add eggs, one at a time, beating well after each addition.

Combine flour and next 4 ingredients, stir well.  Add the flour and all remaining ingredients except cherries.  Stir well.

Drop by rounded teaspoonfuls 2 inches apart onto cookie sheets.  Lightly press cherry half (or quarter!) into each cookie.

Bake at 350 degrees for 12-15 minutes.  Cool slightly on baking sheets, remove to wire rack to cool completely.  Cookies will firm as they cool.

Makes about 8 dozen.

Enjoy!!


Pin It!

Sunday, December 19, 2010

Chocolate Covered......


Anyone want to hazard a guess what this is? 

I didn't make it  - my DH did!!  He took the car for an oil change today and said he saw this on the travel channel while he was waiting.  He talked about it all morning and I mean ALL morning.  Thankfully, I had everything he needed...only 2 ingredients. 

Are you ready?.............................

It's Chocolate Covered...............


BACON

and it's delicious...I could have eaten it all...by myself, all for me...alone, no sharing, mine! 

 He decided to take it to the kids on Christmas...humpf...unless I eat it first!
Pin It!

Saturday, December 18, 2010

Here Come the Christmas Cookies!!

The cookie baking is well underway!   Here's a new recipe I tried this year and  it has only 4 ingredients.  My DH loved them so much I had to hide them so there would be some for the cookie trays....:-D

  This recipe came from Fine Cooking.  Super Yummy!


Peppermint Meringue Kisses

1 c. confectioner's sugar
Whites from 2 large eggs
1/8 t. pure peppermint extract
1/3 c. finely chopped peppermint hard candies 

(A good way to work out your stress!  Just put the peppermints in a doubled zip type freezer bag, grab a meat mallet and pound away.  You want very small pieces.)

Heat the oven to 175 degrees.  Line 1 large cookie sheet with parchment (do not use a non-stick liner).  Sift the confectioner's sugar twice to remove all lumps and divide into two fairly equal portions.

Put the egg whites in a medium bowl.  Beat with an electric mixer on med. speed until foamy.  Increase the speed to medium high and beat until the whites hold soft peaks.  Continue beating while gradually adding one portion of the confectioner's sugar.  Beat until firm, glossy peaks form.  Add the peppermint extract and mix briefly.  Sift the remaining confectioner's sugar over the meringue and gently fold in until blended.

Scoop the meringue into a large pastry bag fitted with a large star tip.  Pipe swirled kissed (about 1-1/2 inches wide and 2 inches high) about 1 inch apart onto the prepared cookie sheet.  Sprinkle the finely chopped peppermint candies over the kisses.

Bake until dry and crisp, about 3 hours.  Turn the oven off and let the meringues cool in the oven for 1 hour.  Serve immediately or cover and store at room temperature for up to 1 week.

Enjoy...more cookies on the way!


Pin It!

Thursday, December 16, 2010

Happy Birthday Cupcake!

My MIL and SIL share a birthday this month.  My MIL gave us a scare a few months ago but Wednesday, she turned 98 yrs. old!  We decided to send them each their own birthday cake.  I love this sweet Penny Black image...I just colored it with Copics,then glittered up the cupcake and flame.


I visited a new cupcake bakery near our city a few weeks ago and purchased a "cupcake in a jar".  It was very expensive and pretty awful.  Soooo, I decided to make my own.  I made these yummy Coconut Cupcakes, removed the paper, cut them in two horizontally, added frosting and sprinkles and then dressed them up for a party:

They got packed securely into a shipping box along with a birthday card.  They were a hit! 

My hubby loved these so much, I made some Red Velvet Cupcakes too.  I froze them right in the jars all ready for decorating for the next birthday.  They will stay fresh in the jar for about 7 days without freezing but freezing them first assures even longer freshness.

Alphabet Challenge Blog - G is for Glitter
Order of the Opus Gluei - If you made it we will come (especially if it's food!)
PaperPlay Challenges #50 - Anything but a Card
YNS Challenges #32 - Let's Party!


Supplies:
Stamps - Penny Black
Ink - Memorex, Copic markers
Paper - Neenah, SU
Accessories:  Spellbinders dies, Glitter, May Arts ribbon FB19, WD46, MR66, paper doily
Pin It!

Wednesday, December 15, 2010

May Arts Ribbon Giveaway


May Arts is giving away all that gorgeous ribbon!  What do you have to do?  Just vote for your favorite "Show us your Plaid" project.  That's it!!  Hurry...the winner will be chosen on Friday.

Back to the cookies!

Pin It!

Tuesday, December 14, 2010

CAS Teapot Tuesday - Ode to Shoes

Thanks to everyone for all the good luck wishes for the craft show this past weekend...it was a lovely success.  It did take me a day to recover and inventory what was left...now it's on to the cookies!

First though...I have a combo card.  This one combines the CAS97 (Sketch by Biggan) and the MMTPT124 Teapot Challenge.    Our Teapot cards this week go to a sweet almost 16 yr. old girl named Abby who has a rare cancer in her lower back.  Abby must undergo a full year of chemo.  We want to flood her with good wishes to help keep her spirits up.  You can read Abby's full story here.

Abby is a girly girl.  She loves all things every 16 yr. old adores...clothes, shoes, dance and music.  I know she would be thrilled to get a card from you.

Cindy said we could get extra points (cookies!) if we finished the sentence on the teapot which begins, "Shoes were always....."  I'm all about extra cookies, so here's mine:

                                                          "Shoes were always calling me.

                                                          I had to own each pair I'd see.
           Spiked pink heels and silver flats,
        Tall black boots and satin spats,
           Shoes with patent leather shine...
            Alas, only memories now are mine
    Shoes were always calling me,
     But bunions now are all I see."

Don't forget the PaperCubed challenge this month.  There's a gift certificate to "I heart paper" up for grabs.  And don't forget my blog candy at the link above.  You've got until Jan. 1 at midnight to enter.

Supplies:
Paper - Bazzill textured
Stamps - Impression Obsession (love this shoe!)
Ink - Versamark Chalk ink
Accessories - Spellbinders circle die, Dotted Swiss EB folder, EP, dimensionals, glue dots, stick on pearls, acrylic heart


Pin It!

Saturday, December 11, 2010

May Arts Ribbon Garland - Tutorial

Do you remember making paper chains as a child?  I know I do!  I've come up with a grown up version for you to make.  All the details can be found over at the May Arts Blog.  There's a complete tutorial waiting for you...presents, don't you just love presents?  Speaking of presents...did you know that May Arts give away ribbon on their blog and Facebook page because they LOVE their customers?  Have you won yet?


Pin It!

Friday, December 10, 2010

Foodie Friday, Blog Candy and Bows

I don't know about you but I need longer days!  So much to do and so little time.  This week's Foodie Friday recipe is perfect for the blustery cold busy day we had today.  Simple, fast and packed with flavor no one will believe how little time it takes for so much yummy goodness.  Add a simple Caesar salad and you've got an elegant meal in less than an hour.


Sausage Minestra

1 lb. link Italian sausage, skin removed and cut into 1 inch pieces (I use a mixture of sweet and hot)
2 c. onion, diced
1 T. garlic, minced
2 t. dried Italian seasoning
1/2 t. kosher salt
1/2 c. dry white wine
6 c. chicken broth
2 c. tomatoes, seeded and diced or you can used canned diced tomatoes
1/2 c. dry orzo pasta or other small pasta shape
3 c. fresh spinach, chopped
4 T. olive oil, divided
Parmesan cheese
croutons

For the croutons:
Toss the croutons with 2 T. olive oil.  Heat oil in a skillet over med. heat.  Toast croutons until crisp.  Set aside.

Saute the sausage in 2 T. olive oil over med. high heat until browned.  Add the onion, garlic and seasonings; cook 3-4 minutes or until the onion is soft.

Deglaze the pan with the wine and reduce until almost evaporated.  Add broth, tomatoes and orzo.  Bring to a boil, reduce heat, and simmer about 10 minutes or until pasta is cooked.

Stir in spinach until wilted.  Serve with croutons and Parmesan cheese. 

(Serve the rest of that wine, add some candlelight and you've got dinner to rival that fancy Italian restaurant down the street) ;-)

Now for the bows...The CAS challenge on SCS this week is bows...I needed a fast card for the project I did earlier this week. 

Our color theme was pink/silver/green.  I chose silver mirror card from Marco's Paper, a glossy pink cs I got on clearance at Big Lots and the Spellbinder's ornament die.  A hot pink bow, a little pink bling and done.

And now the Blog Candy......

 3 Making Memories Mat Stacks containing 48 sheets each
4 pkg. of Bazzill Basics and Accents bling
Hero Arts Watercolor flower stamp set
Glassine bags
Manila Tags
Elegant paper doilies
Swivel mini album
Copic marker
brads and an assortment of yummy May Arts ribbon (not shown) I will add a yard of every ribbon and a few more from my Etsy shop
I will draw a winner on New Year's Day.  All you need to do to win is place a picture of the blog candy on your blog with a link back to this post, then leave me a comment to let me know you did.    That's it!

  Thanks so much for your visits...we blog because we love to know what you think.

 Merry Christmas,
Pin It!

Wednesday, December 8, 2010

WOYWDW


Well, it's Wednesday, time for WOYWDW at Julia's Stamping Ground and that means I missed the post for Teapot Tuesday!  I had to pull a card from my stash to send because I've been working on a big project for the teen girls at a home called Place of Hope.  Our church holds a ladies tea every Christmas season and this year, they decided to rally the different groups and campus locations to decorate a themed table complete with dinnerware for Places of Hope.  Our campus theme was "Spa" for the teen girls home.  There was a sports table, a game table, a girly accessories table, a movie night table, etc. 

The girls get to keep everything on the table from the tablecloth to the silverware, dishes, candles, etc.  I was blessed to be asked to help out our pastor's wife.  I, in true Charlene style, forgot my camera, so our pastor's wife promised to take lots of pictures for me which I hope to share.  It was quite beautiful and was receiving lots of compliments as we put things up.  
All that said to tell you that my stamping will be very sporadic as it is COOKIE SEASON.  I will be baking dozens and dozens to give away as gifts to friends, neighbors and my DH's work.  You can see some photos from last year in my December 2009 posts.  I will attempt to take more as I bake.

For now, I'm working toward a craft show this weekend...here's a couple of my little helpers.....


Posted by Picasa
Pin It!

Sunday, December 5, 2010

Clean and Simple Monday & May Arts Giveaway!

My CAS DT time has ended....but Clean and Simple Mondays will continue on because I love CAS cards.

This week's SCS CAS challenge (CAS96) is Bows.  Since this is package wrapping season, I just wrapped up a little card package and tied with a big red bow.  Super fast, super easy...Clean and Simple...what do you think?

 All supplies Papertrey Ink.  Linking up to Michelle's Pink Paper Paradise Make it Monday.

Ok, who doesn't LOVE new ribbon, especially when it comes from May Arts?  Hop on over the May Arts blog and take a look at what's new and just for peeking...they have a giveaway for you!  (Hmmm..poet and didn't know it!!)

 
Pin It!

Friday, December 3, 2010

It's Foodie Friday!!

Mmmm....Are you hungry yet?  That's ok because these yummy muffins from the Pioneer Woman's Cookbook take only a few common ingredients and even fewer minutes to whip up.

Here's the recipe:

Marmalade Muffins (Don't freak out marmalade haters..you know who you are!  There isn't any in here!)

2 oranges
2 sticks butter, softened
1 c. granulated sugar
2 large eggs
2 c. all purpose flour
1 c. buttermilk
1 t. baking soda
1 c. firmly packed brown sugar

Preheat oven to 375 degrees.  Grease 24 mini-muffin cups.

Using a microplane grater (here's the one I love), grate the zest from both oranges.  Be sure not to get any of the bitter white part.

Cream the butter and sugar until light and fluffy.  Add the eggs and beat well.

Sift the flour (or not!) and add to the batter.  Gently blend just until mixed in.

Combine the buttermilk, baking soda and orange zest.  Blend again just until all ingredients are moist.

Fill muffin cups 2/3 full.  A medium cookie scoop is just about right.

Bake for 12-17 minutes or until light brown.

While muffins are baking, juice the oranges.  Combine the juice with the brown sugar in a medium bowl.
Drizzle the muffins with the glaze as soon as they come out of the oven, thoroughly coating each muffin.
 
Now comes the hard part....eat just one!  Betcha can't!!  I'm getting these out of the house asap!!  I've already had.....5!!!  Shhhh...I'll keep your secret if you keep mine.  Pinky promise?


Pin It!

Wednesday, December 1, 2010

It's Time for the December Challenge at PaperCubed and WOYWDW!

The first day of the month means it's time for another 3D challenge at PaperCubed (P3)!  Our challenge this month is to create an organizer.  I think our DT leader, Kim, had Christmas organizers in mind and I truly did try but my mojo wouldn't go there....soooooo,  I decided to make an organizer to give our granddaughter along with a book we got her for Christmas.  She can keep track of the books she reads each month as well as the things she has to do...like dance lessons and clubs. 

She's a girly girl so I chose girly girl papers from SEI Chick-a-dee line.  I think she'll love the funky little birds dancing across the papers and all the sewing around the edges. 

I added a pocket to the front and slipped a little bookmark inside.  Check out those funky fibers! (Basic Grey Two Scoops)

Inside are lined and numbered month by month pages.

I also remembered to take a couple of shots for Stamping Ground's What's on Your Work Desk Wednesday.  Here's how I started late in the evening....see I did have Christmas in mind.

Here's what I woke up to this morning:

Time to clean up!!

Remember you have all month to participate in the PaperCubed ChallengesPop over to see the rest of the awesome (and I do mean awesome!) DT samples and to see what this month's prize is.

Don't forget to pop over to WOYWDW for some workdesk fun.  It'll make you feel better.  ;-)

Pin It!

Monday, November 29, 2010

May Arts, Jenni Bowlin Week!

It's here,  it's here!  May Arts Ribbon and Jenni Bowlin have teamed up to bring you some awesome holiday ideas.  You know they're givin' stuff away!  Head on over to the May Arts blog for a better look at my project, then check out the giveaway goodies.  Happy May Arts/Jenni Bowlin Week!    I can't wait to see what you think of my project.  You'll find links to all the supplies on the May Arts blog.

Grrrr...I just deleted my signature!  Geesh!

C.R.A.F.T Challenge - Christmas present challenge
Pin It!

Sunday, November 28, 2010

Clean and Simple Monday - Flower Accents

Today's SCS CAS challenge is a bittersweet one.  The Fall DT has come to an end and the new Winter DT will be announced soon.  I still pinch myself that one of my dreams actually came true (after many tries!).  I'll continue Clean and Simple Mondays because I love this style of cardmaking.  It can be harder than using lots of paper and embellishments but a lifesaver when time is short.

This week's challenge (CAS95) is to use Flower Accents as in Primas, punched flowers, etc.  My friend, Patty, gave me these sweet flowers a while ago and because I was in one of those "time is short" periods, they were just perfect paired with that gorgeous May Arts Wrinkled Ribbon(EA16).  I took about a dozen photos and couldn't get the colors right because of the light.....oh well.


I used the Scor-Pal to score the cardstock on all four sides, sorry it's hard to see,  then just added some punched leaves to the blue flowers.  Easy, Peasy.


Supplies:
Paper - Neenah Classic Solar White
Stamps - SU Warm Words
Ink - Versafine
Accessories - Scor-Pal, May Arts Ribbon, punched flowers, leaves


Pin It!

Friday, November 26, 2010

Short and Sweet

Edited to add:  Sorry to my email readers...blogger was scheduled to post this at 3:00 AM and threw it into draft instead...anyone else have that problem?

Quick post today...Off in the wee hours to do some Christmas shopping with the rest of the crazy people.  I've never gone the day after Thanksgiving before but there are a couple of things that are really good buys that were on our gift list sooooo....wish me luck.

This is a little 3" x 3" card that is off on a secret mission to cheer someone.  Cindy Motherway aka Mothermark at SCS has organized the Teapotters for a Top Secret Mission.  We are to make a 3x3 and send it to Cindy for preparation for their final destination.


Supplies:
Paper - SU Rose Red, Black, Neenah Classic Solar White
Ink - Memento black, Versfine Black, Copic markers
Stamps - Papertrey Year of Flowers Mums, Simple Little Things


Pin It!
01 09 10